Install Pi-hole v6
Install Pi-hole and configure it with a secure DNS resolver.
If you skipped to this section, expand for setup notes.
If you installed Pi-hole on an existing device or skipped to this section, these OS-specific things might be different for your setup:
- Installed software like Git, curl, or zsh.
aptpackage manager - your OS might use a different one.- The Pi’s hostname is
pi-holethroughout this guide.
-
SSH to the Pi:
From your device ssh pi-admin@pi-hole.localReplace
pi-adminwith your username if you chose a different one in Raspberry Pi Imager. -
Update the system and install dependencies:
From the Pi sudo apt update && sudo apt upgrade -yThis can take 10-20 minutes even on a freshly installed OS.
-
Run the Pi-hole installer:
From the Pi curl -sSL https://install.pi-hole.net | bash -
The installer prompts you with warnings and options. Select:
- Static IP Needed: Continue
- Upstream DNS Provider: Cloudflare - You can switch to unbound later.
- Blocklists: Yes to include the default list. We’ll change it to a more curated set of lists later.
- Enable Logging: Yes - this helps diagnose issues like when streaming apps won’t load.
- Select a privacy mode for FTL: 0 - shows which site was blocked on which device. See the official privacy level docs for other options.
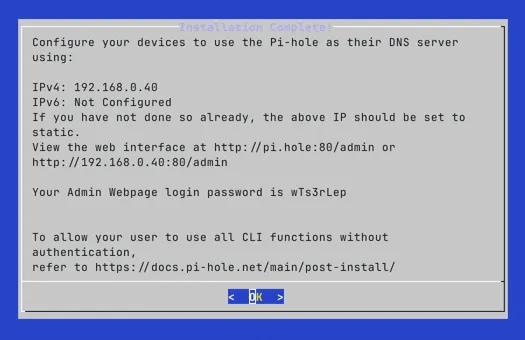
The last screen lists the IP address and a temporary password. You’ll change the password next, so you can ignore it here.
-
Set a permanent password:
From the Pi sudo pihole setpassword -
Open
https://pi-hole.local/adminin a browser.The browser will show a security warning about the security certificate.
- Chrome: select Advanced, then Proceed to pi-hole.local (unsafe).
- Firefox: select Advanced, then Accept the Risk and Continue.
If you don’t see the option to proceed, refresh the page.
Optional: Configure Unbound as Recursive DNS
Section titled “Optional: Configure Unbound as Recursive DNS”Unbound is a recursive DNS resolver. Instead of forwarding DNS queries to Cloudflare or your ISP, unbound resolves queries by walking the DNS tree from the root servers. This means no single upstream provider sees all your DNS queries.
Pi-hole works well with Cloudflare. Add unbound if you prefer the additional privacy of recursive resolution.
-
Install unbound, then immediately stop it so that you can set your own configuration:
From the Pi sudo apt install unboundsudo systemctl stop unbound -
Create the Pi-hole-specific unbound configuration:
/etc/unbound/unbound.conf.d/pi-hole.conf server:verbosity: 0interface: 127.0.0.1port: 5335do-ip4: yesdo-udp: yesdo-tcp: yesdo-ip6: noprefer-ip6: no# Trust glue only if it is within the server's authorityharden-glue: yes# Require DNSSEC data for trust-anchored zones# harden-dnssec-stripped enables DNSSEC validation - unbound rejects responses# that fail cryptographic signature checks, protecting against DNS spoofing.harden-dnssec-stripped: yes# Don't use Capitalization randomizationuse-caps-for-id: no# Reduce EDNS reassembly buffer sizeedns-buffer-size: 1232# Prefetch close-to-expired cache entriesprefetch: yes# One thread is sufficient for a home networknum-threads: 1# Ensure kernel buffer is large enoughso-rcvbuf: 1m# Ensure privacy of local IP rangesprivate-address: 192.168.0.0/16private-address: 169.254.0.0/16private-address: 172.16.0.0/12private-address: 10.0.0.0/8private-address: fd00::/8private-address: fe80::/10 -
Start unbound and verify that it’s running on port 5335:
From the Pi sudo systemctl start unbounddig google.com @127.0.0.1 -p 5335 | grep NOERRORYou should see a
NOERRORstatus and an answer section with an IP address. -
Point Pi-hole at unbound with Cloudflare as fallback.
In the Pi-hole web interface, go to Settings > DNS:
- In the Custom DNS servers field, add
127.0.0.1#5335. - Keep Cloudflare checked as a fallback.
- Select Save.
- In the Custom DNS servers field, add
-
Verify Pi-hole is using unbound:
From the Pi dig google.com @127.0.0.1 | grep NOERRORYou should see a
NOERRORstatus. The first query may be slow as unbound builds its cache.
Optional: Monitor Pi-hole with Netdata
Section titled “Optional: Monitor Pi-hole with Netdata”Netdata is a lightweight real-time monitoring tool with a built-in Pi-hole integration. It shows query rate, cache hits, blocked domains, and FTL status alongside system metrics such as CPU, memory, temperature, and Fail2Ban statistics.
The Pi-hole web interface already shows DNS stats. Add Netdata if you want system-level metrics alongside your Pi-hole data.
-
Install Netdata:
From the Pi curl https://get.netdata.cloud/kickstart.sh > /tmp/netdata-kickstart.sh && sh /tmp/netdata-kickstart.sh --disable-telemetryThe installer takes a few minutes.
When it finishes, Netdata starts automatically and auto-discovers Pi-hole.
-
Allow the dashboard port through UFW if you want access from other devices on your network:
From the Pi sudo ufw allow 19999/tcp comment 'Netdata dashboard'If you’ll only access Netdata over an SSH tunnel
From the Pi ssh -L 19999:localhost:19999 pi-admin@pi-hole.local -
Open the dashboard at
http://pi-hole.local:19999Scroll down to the Pi-hole section to see query rate, cache, and blocking stats alongside system metrics. -
Enable the Fail2Ban collector to see banned IPs per jail. This command copies the default configuration.
After it opens, press CTRL+X to save it:
From the Pi sudo /etc/netdata/edit-config go.d/fail2ban.conf -
Restart Netdata to apply:
From the Pi sudo systemctl restart netdataThe Fail2Ban section will appear in the dashboard showing currently banned IPs and active failures for each jail.
Checkpoint
Section titled “Checkpoint”At this point Pi-hole is installed and running.
Before you continue to blocklists and allowlists to control what gets blocked, confirm the following:
- Pi-hole web interface loads at
https://pi-hole.local/admin. - DNS queries are appearing in the query log.
- The default blocklist is active. You can check Gravity in the Pi-hole dashboard to confirm.
- If you run into issues, see Common Pi-hole Issues.